Rebuilding My Knee in 3D
From MRI to Resin
August 5, 2025
I tore the meniscus in my left knee last year. Most 3D knee models online are right knees, so I decided to make my own left-knee model from my scan. The MRI I used was from a later skiing accident, months after the original meniscus tear had healed, so the dataset reflects the reinjury work-up, not the initial tear.
The study came as a DICOM series of images. In 3D Slicer, I loaded the volume and checked voxel spacing; like many MRIs, it was anisotropic (fine in-plane pixels, thicker slices). To avoid “pancake” artifacts in the mesh, export the 3D STL file to Blender to smooth.
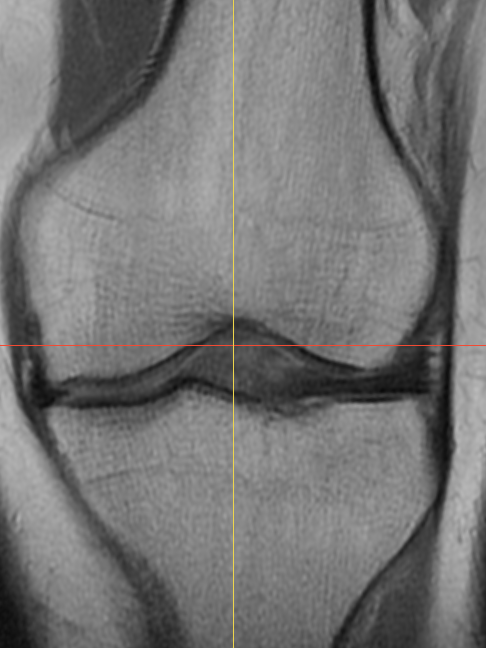
Caption: MRI of the left knee from the skiing accident.
Segmentation was done in Slicer’s Segment Editor. I created separate labels for femur, tibia, and patella, plus a combined soft-tissue mask for meniscus/cartilage. Thresholding got me close; “Grow from seeds” and manual painting/erasing cleaned boundaries. I constantly compared the 3D preview with slice views to catch pinholes, jagged rims on the tibial plateau, and gaps around the patella before exporting.
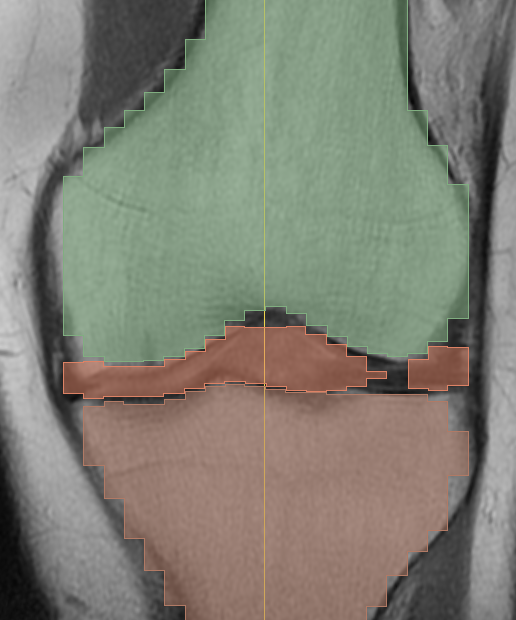
Colored masks overlaid on the MRI slices. This is where errors are easiest to spot and fix.
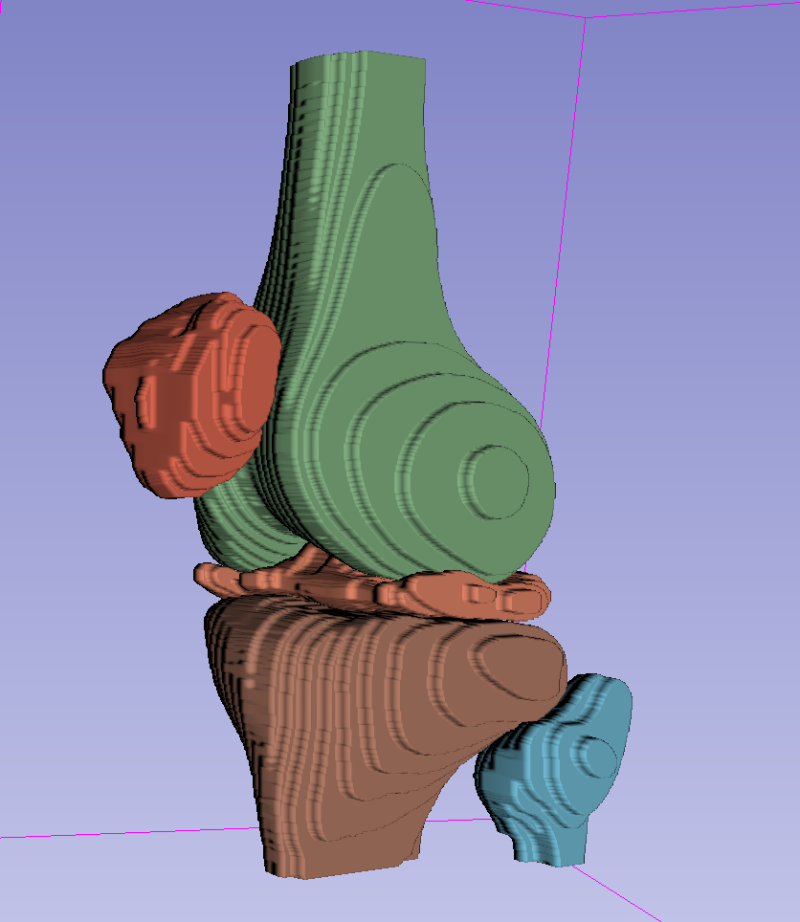
Live 3D surface preview in Slicer helps catch holes and voxel stepping before export.
I exported each segment as STL and moved to Blender for cleanup. Medical meshes are dense and a bit noisy, so I imported at real-world scale (mm), fixed non-manifold edges and intersections, then remeshed lightly to regularize triangles. A low-iteration Laplacian Smooth reduced voxel stair-steps while preserving anatomical landmarks (condyles, trochlear groove, tibial plateau rim). If I needed smaller files, a gentle decimate pass kept details while trimming triangles.
For printing, I hollowed the model to 2–3 mm wall thickness with discreet drain holes, then oriented it around 30–45° in the resin slicer to reduce peel forces. Medium supports under overhangs kept surfaces clean. At 50 µm layer height, detail/time was a good balance; a few stronger bottom layers helped bed adhesion. After printing, I washed in IPA, UV-cured, clipped supports, and did light sanding; a matte clear coat made the subtle curvature read clearly in ambient light.
TODO: add Scliser Image
TODO: Add 3d Print Knee
Finished left knee print in resin. Curvature of the femoral condyles and tibial plateau shows clearly.
A few takeaways if you try this: MRI is ideal for soft tissue (like a meniscus), but bony edges won’t be as crisp as CT. Voxel spacing matters: resample early to avoid fixing artifacts later. And smoothing is selective: too much erases exactly the features you care about. For me, this solved a simple problem: most downloadable models are right knees, and produced a left-knee model that actually matches my anatomy from the post-skiing-accident MRI. It’s a helpful visualization tool, a good 3D printing exercise, and a tidy way to turn a sports injury into something you can study on your desk.

